Search ...

Showing posts with label Sewing. Show all posts

Sep 5, 2011

Sew Skirt September - Basic Skirt Sewing continued


Dear Readers,


Hope you have checked out the Drafting Tutorial for Basic Skirt, Now let us see the Sewing Part of Basic Skirt / Straight Skirt! 


Hail Skirts this September! yay!


I would like to mention one thing here - I will not be delving deep into the details of certain steps like attaching a zipper and adding pleats to vent as there are already crystal clear tutorials for them! We have lots of unknown details to visit don't we, so lets concentrate on them, which will help us draft and sew many styles of skirts this September!. 


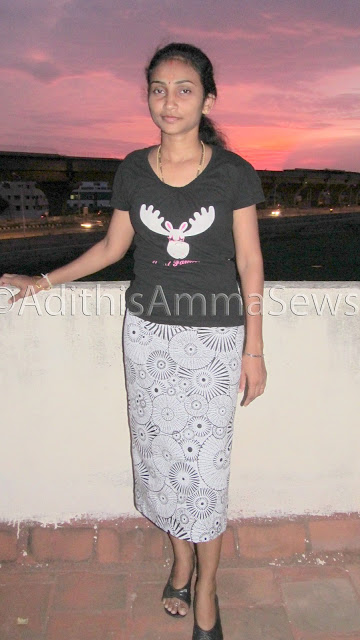
First lets sneak peak at what are going to make, have a look at basic skirt i have made for self!


Lets get started 


Step 1 : Cut the Skirt pieces


Step 2: Waistband


Height - 1 - 2 inches max as desired


Length :
Waistband for front measuring exactly the same amount as skirt front waist arc (after deducting darts!)
Waistband for back measuring Skirt Back wasit arc (Deducting darts) + 1 inch for closure extension


Note: If you are planning to have opening at sideseam (if prefer not to as at hip curve bulge will expose zipper and it is better placed at CB), then you can have back wasitband as 1 piece itself


If you are planning to have opening at CB (i did!) then you need to cut 2 back waist band into 2 pieces such that 1 piece is 1 inch longer than the other!


Step 3: Interface the waistband ( i have used  1 inch stiff interfacing) and join seams, press open the seams


Step 4: Stitch the darts at Skirt Front & Back


Step 5: Preparing the Vent piece. I like my skirts to be modest for a mature woman like me who drops and picks up her daughter from school, so always add vent pleats at back for straight skirts like the basic skirt or even pencil skirt to allow ease of movement and at the same time ensure modesty!


Have shared photos of it when i added the vent, for your extra reference , here is the Vent Pleat tutorial i learnt this from, this will surely help you add Pleats to your Skirt vents!


Pressed Pleats


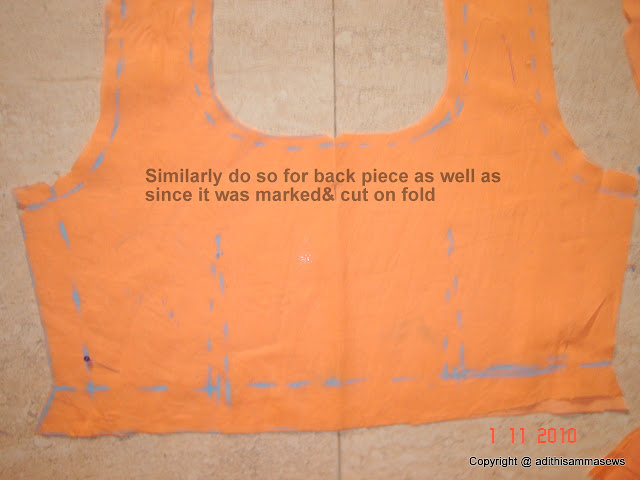
Similarly pin and stitch vent to the other half of back skirt


Press the Vent Pleats back in place

This is how it will look like from the RS of the back skirt


Step 6: Once Pleats are added, then stitch the Center Back seam from Zipper end position till the Vent position mark.
Note :  Please see that it is not from CB notch the CB seam is stitched as mentioned in picture, but from end of zipper to beginning of vent pleat attachment at CB


Step 7: Stitch the vents in place as an inverted V on top of them 
On the RS of skirt back top-stitch an inverted V at the top of the Vent pleat as shown below


Step 8: Add Zipper to CB opening; I have used normal zipper here (ran out of invisible zippers he he!; need to restock them!) Open up the Zipper by pulling the zipper pull. First pin RS of Zipper to the RS fabric of skirt (Right side portion of Back Skirt!) such that Zip teeth matches with CB Notch, stitch in place. Edge stitch on RS of Skirt


Then Pin RS of the other side of Zipper to the RS fabric of skirt (Left side portion of back skirt!) such that Zip teeth is about 3/8 inch away from CB seam. Stitch in place and make a top-stitch 1/2 inch from CB Seam and then at zip end point stitch a horizontal line , so the top stitch forms the shape of 'L'


Here is a link to one zipper tutorial using normal zipper, there are various ways of doing it, i have done it using one method, the link shows another way (which i used to do earlier! as a beginner) here again just google to find the one which suits you, i am just sharing what caught my eye!


Step 8: Stitch the side seams ; (no picture needed for this, isn't it!)

Step 9: Attach waist band to the Skirt. Remember the Back waist band with extension should be on the Right half of the Back Skirt  and the one without the extension should be on the Left Half of the back skirt. Add closure at end of waist band as desired, i have added normal hoop and thread loop closures as used in saree blouse! the Loops are added at the extension exactly at 1/8 to right of CB notch and hooks added at 3/8 from CB on the WB piece without extension

Forgot to take picture of this, no probs, here is a link for your reference, you can just google and get umpteen options, just choose one which suits you best !


Step 10: Finish Hem (I have used 2 inch Hem to give couture finish!) 

Here is the finished Straight Skirt / Basic Skirt


Hope this tutorial helps you out in sewing up a straight skirt / basic skirt with vents at back! Did you like this tutorial, any doubts, please do leave your feedback in comment section! 


Also feel free to Pin this to Pinterest, share it on facebook, tweet it by using share buttons available at the end of the post. If you would like to share this with your blog readers, click on Create Link button at the end of the post, so that a back link for this tutorial will be created!


To view all Sew Skirt September Posts - Click HERE

Pin It


Share/Bookmark

Aug 8, 2011

How much Sewing is Too Much Sewing - Join the Debate!

How much sewing is Too Much Sewing? Lets find out ....


Before we start with serious topic, i would like to Wish All of You Happy Friendship Day! i know it was yesterday, 7th August, 1st Sunday of August, but i was so held up to access my Laptop (Oh yes my sister gifted me with a laptop for this b'day! will do a post on the lovely black beauty a bit later!) as my Darling Daughter was not keeping all that well with stomach ailments, and hence the delay, it is always better than never isn't it, so Dear Readers of Adithis Amma Sews, Happy Friendship Day!

Now lets us get on with the topic of the month, probably, topic which we will discuss all this month of August!

How do you know that you have reached the sewing limit for the day? What if you are amidst sewing a pet project of yours,or may be sewing on tight deadline, or sewing for a loved one or sewing for a special occassion which can't be missed, then you realize that it is on the verge of breakdown due to overload, no I am not talking about the wear and tear your sewing machine undergoes, it does, agreed but its just a machine(i know my heart aches while calling it just a machine, when it is kind of your soul mate and sewing your spiritual being!)

Imagine what happens to your body? We all get sour shoulders, pain on fingers , strain in calf muscle / legs, i thought that since i had motor machine, i have nothing to worry, i was so wrong! My Yoga teacher asked me about my heat boils and tried to analyse why they don't seem to go away! After a discussion it dawned on us that my sewing on motorized machine and the heat the foot pedal generates indeed is harmful to my legs and the damage doesn't stop just there, but prolonged exposure to heat of electric pedal leads to clots in uterus, now the panic bells rang for me!

This deeply affected me and i wanted to share this with you all and may be we can together find ways of preserving our bodies, and still be able to continue our passion of sewing! Please leave your suggestions, i plan to discuss about the issue all through the month of August, who knows the tip that you have may as well save someone's health and hobby or livelihood to some!

So lets try to find answers for these questions (we can add new ones to the list, once you think of them let me know!)

How much Sewing is Too Much Sewing?
Precautions to be taken to reduce wear and tear to body due to Sewing!
Gadgets are they a boon or bane to sewist?!
How to optimize sewing through minimum work hours put in!


The list is bound to grow and hope to find more solutions to each of them, join in, lets help ourselves!


Share/Bookmark

Jan 6, 2011

Patternless Skirt in under 15 minutes - Tutorial


For Sale - Kids Custom Clothing From Adithis Amma Sews- Click Here


Patternless Outfits have been my favourites. When i started sewing (i started with sewing saree blouses, quite difficult for beginners i know!) in my late teens. After the sabbatical when i returned to sewing after delivering my daughter, i began sewing patternless tops for the tiny new born and then 'graduated' to sewing patternless skirts... before i embarked on the journey of learning to draft patterns (which i btw love the most in the entire field of fashion design)

When decided to kick off sewing for the first time for the new year 2011, i kept thinking what to do, (i thought in between my domestic chores, remember i am back after vacation and have loads of laundry to do!) kept thinking and before i realized it was already evening, now with limited time available and mindset firmly stuck to 'Sew Something' for the  day, i had no option but to take the plunge.

Thank god i had no confusion in whom to sew for, of course for my DD as it is my first sewing for the year and remember she is my muse!

So i decided to do the Drindle skirt or the simple rectangle piece turned into skirt

There are just 6 Steps to right from cutting to sewing:


Share/Bookmark

Dec 18, 2010

Pattu Paavadai Tutorial - Part II


Online Teaching takes a new meaning with all those Tutorials floating online for free. Here is one from AdithisAmmaSews


Hope you gals (n guys) checked out 'Pattu Paavadai Drafting' tutorial posted earlier.

Are you wondering why is there no draft for the Paavdai a.k.a Skirt... Well let me clear that doubt off..
Silk Skirt or Pattu Paavadai does not need a draft and is based on a formula! Yes... it is as simple as that once demystified....

Pattu Paavdai is an all round pleated skirt.

Pleats that are best suited are :
  • Box pleats (especially for toddlers and little girls less than say 8 years), this adds more volume at hips and since toddlers and girls less than 8 yrs have waist and seat as almost the same, it also gives an illusion of shape (I personally heart Box pleats and use them in all the Paattu Paavadais i make)
    BOX PLEAT 

  • Knife Pleats for grown up girls as i am sure you want to look shapely. 


Before we start sharpening our math skills, let us do the first step.


Measure the height of the fabric and see. [The fabric i have is 68"wide(Selvage is width here) and 36" tall ]


Height of the skirt a.k.a Pattu Paavadai = Total length of the child from Shoulder to Ankle - Bodice length

Height of the Paavdai i am making should be  = 41.5 - 10 = 31.5 

But i have 36 " , whereas i require 31.5" only. Of the extra 4.5"  1/2" would go off for seam allowance at waist seam, remaining 4" needs to be tucked in  so make a tuck pleat of 2 inch depth folded. Ta Da you have proper height altered skirt fabric....


  • Mark and pin  the required depth of Tuck to alter the Height (Tip: make sure the tuck ends atleast 1/2 inch before the Zari Border so that fabric hangs gracefully even after Tucking it)

Tuck of 2 inch depth i.e, 4 inch in total pinned up 


  • Before stitching the tuck check for the alignment of pattern (if any) on the right side of fabric; Once patterns or motifs are aligned then stitch the tuck


  • Press the Tuck to one side i.e., towards the Zari Border and see the neat finish on the right side


Now width of the fabric needs to be adjusted to suit waist round of the child

For this tutorial i am making a Pattu Paavdai for my Darling Daughter's dear friend whose waist measurement is 22 inches so i have added ease of 2 more inches so i need a waist of 24 inches all round box pleated. 

The width of the Silk Paavadai Cloth I have is 68 inches. (Width of the cloth for Paavadai as available from the shop needs to be measured along selvage ! )  After exclude 2 inches for seam allowance , all i have to work with and make pleats is 66" 

66" needs to be pleated and reduced to a waist round of 24 inches !

So sharpen your math skills, here we go; Aactually i borrowed on my Hubby's math skills, earlier i used to ponder and pin and re-pin pleats of different lengths when i sew the Silk Skirt a.k.a. Pattu Paavdais)

Thanks dear hubby for the super formula.

Width of the Fabric will be X
Waist round to be achived will be Y

I would like to have 10 pleats in all (5 at Front + 5 at back ; though we have only seam at Center Back)

Width of Pleat  = (X - Y) / (Number of pleats desired * 2) [For BOX Pleat]


Width of Pleat  = (X-Y) / Number of Pleats desired [For KNIFE Pleat]

Width of my box pleat = (66-24) / (10*2)

Width of my box Pleat = 2.1 inches.

The above width is the resultant box pleat width and for the actual box pleat to appear we would need 2.1*2 = 4.2 inches of fabric 


  • Along the selvage of fabric mark section 4.2 inches apart 

    (Mark (Width of your box pleat * 2) for each section)

  • Pin up the sections and make box pleat in each section
  • Check if the Pinned up fabric width equals waist round
Check Waist Round after Pinned up the Pleats
  • Top stitch the pleats for about 1.5 inch (it includes 1/2 inch for seam allowance while joining the waist to bodice)
  • Finish the center back seam ( i have used French seam coz the silk fabric unravels a bit more)
Pattu Paavadai is ready to be joined to bodice portion. 


Please do leave a comment or at least choose your reaction to the tutorials as that motivates me. Acknowledgement of any work is due isn't it... so please bring a smile on my face, give your feedback.

Happy Weekend.

Click Here to Pin This to Pinterest Pin It

Share/Bookmark

Nov 1, 2010

Saree Blouse Sewing/Stitching Tutorial


For Sale - Custom Made Clothing From Adithis Amma Sews Check my Etsy Shop- Click Here


Online Teaching takes a new meaning with all those Tutorials floating online for free. Here is one from AdithisAmmaSews


Saree Blouse FRONT

Saree Blouse BACK


Hope you already have the pattern ready, if not please check Saree Blouse Pattern Drafting Tutorial

Lets see Saree Blouse Stitching / Sewing Instructions in the form of a Picture tutorial.


Finished blouse with the Saree


For more tutorials Click HERE
Click Here to Pin This to Pinterest Pin It

Share/Bookmark

LinkWithin